

Here is a little bit about Sweet Charli Author Kami:I am the mother of Charli (she's my whole world, hence the name of this blog!), sister to Jena, wife to Jordan. I love creating things, especially accessories. I love checking out other creative blogs and sharing ideas! Blogging is the evil that prevents me from doing most of my housework! I also have been practicing a lot of fun things on my sewing machine, I hope to one day move out of the 'beginner' category! I am surrounded by wonderful family and friends here in Utah, most of whom I get lots of my inspiration from! I hope that this blog will inspire all you to do the same!
Here's a little taste of what these creative MOMMIES will inspire you to create!
Spring Wreath Tutorial

This wreath is so much fun, I love the way it brightens up my door from the road. Here's what you'll need:
Styrofoam Wreath Form
Tissue Paper
Flower
Wire
Hot Glue
Ribbon
FIRST- cover your wreath form with tissue paper and glue (I used mod-podge 'cause that's my "solve everything" glue!)

SECOND - start making your tissue paper flowers. If you've never made one before, here's how:
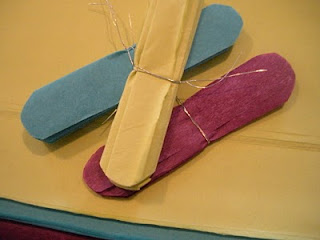
Cut a square of tissue papers (I used about 5 sheets, 4x4 squares) and begin folding back and forth like you did in elementary to make a fan. Once done folding, take your wire and wrap around folded paper, and twist the wire so the paper won't come unfolded.
Then, cut the ends of the tissue to be round.
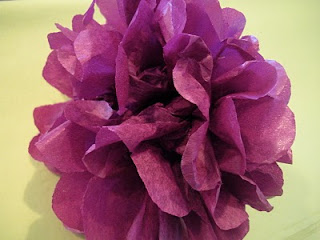
THIRD - take each flower and begin spreading the tissues apart. Be careful not to rip them. If there are a few rips, however, they aren't very noticeable!
FOURTH - once you are done making all your flowers (place them around the wreath so you know when you have enough), trim all the wires to about 1/2 in - 1 in stub.

FIFTH - make sure before you glue your flowers to your form, you place them all where they are going to go. *Be sure to glue the ribbon on (to hang your wreath) BEFORE you glue your flowers on!

SIXTH - put glue around the base of the wire stub, then stick the wire into the styrofome.

Hang your wreath with that pretty ribbon you glued underneath your flowers and
Waaahlaah!
Hope you enjoy your new Spring wreath!
***SAVE THAT LEFT-OVER TISSUE PAPER, FOR MORE FUN, SPRING IDEAS***
And, here's another GENIUS idea (I'm gonna make this one - I LOVE it)!
Earrings & Jewelry Stand Made in only 1/2 HOUR!

Seriously, this project took 30 minutes max! And I literally had everything I needed to make it laying around my house!! Here's what you will need:
Any kind of frame
Paint
Sand Paper
Fabric
Wire/String/Chicken Wire - (your choice)
Hot Glue
Cork Board
(the soft kind, your earrings will not poke through if it is hard)
Jewelry!
Here is an old frame I had...

I painted in black, then sanded it

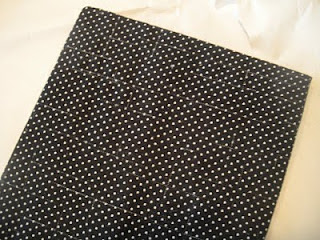
Took my cork board and cut it to fit in one of the sides of my frame...

Wrapped one of my fabrics around it and glued the ends
I took my wire (you can use chicken wire, that'd be really cute, and I think you could probably fit more earrings), glued it to the inside of my frame.

Then I put the other fabric in the other side, added all my danglies, and studs, and some rings and a bracelet...(I put push pins in to hold my rings and bracelet)
and whaalah!

It not only makes a great jewelry stand, but also an added home-decor item!
FYI: If you decide to make this cute item, and have lots of earrings like muah (me), I suggest using a bigger frame!! And if you do make this, please send us a pic! We love seeing all the different ways one item can be made. We will post your pictures for everyone to see!
Love,
Kami
Thank you so much, Kami! Please go to Sweet Charli and visit Icing on the Cake there today, and don't forget to hit Kami's follow button to help her reach her goal of 200 followers by April!


love your ideas! new follower here, found you through TGC!
ReplyDeleteThanks! I'm now a follower of The Frugal Designer! My hubby's actually an architect/builder, and I love interior design! Can't wait to dig through your blog a bit more:)
ReplyDeleteThat's really pretty, I was just talking today about how I would like to make a jewelry holder!
ReplyDelete